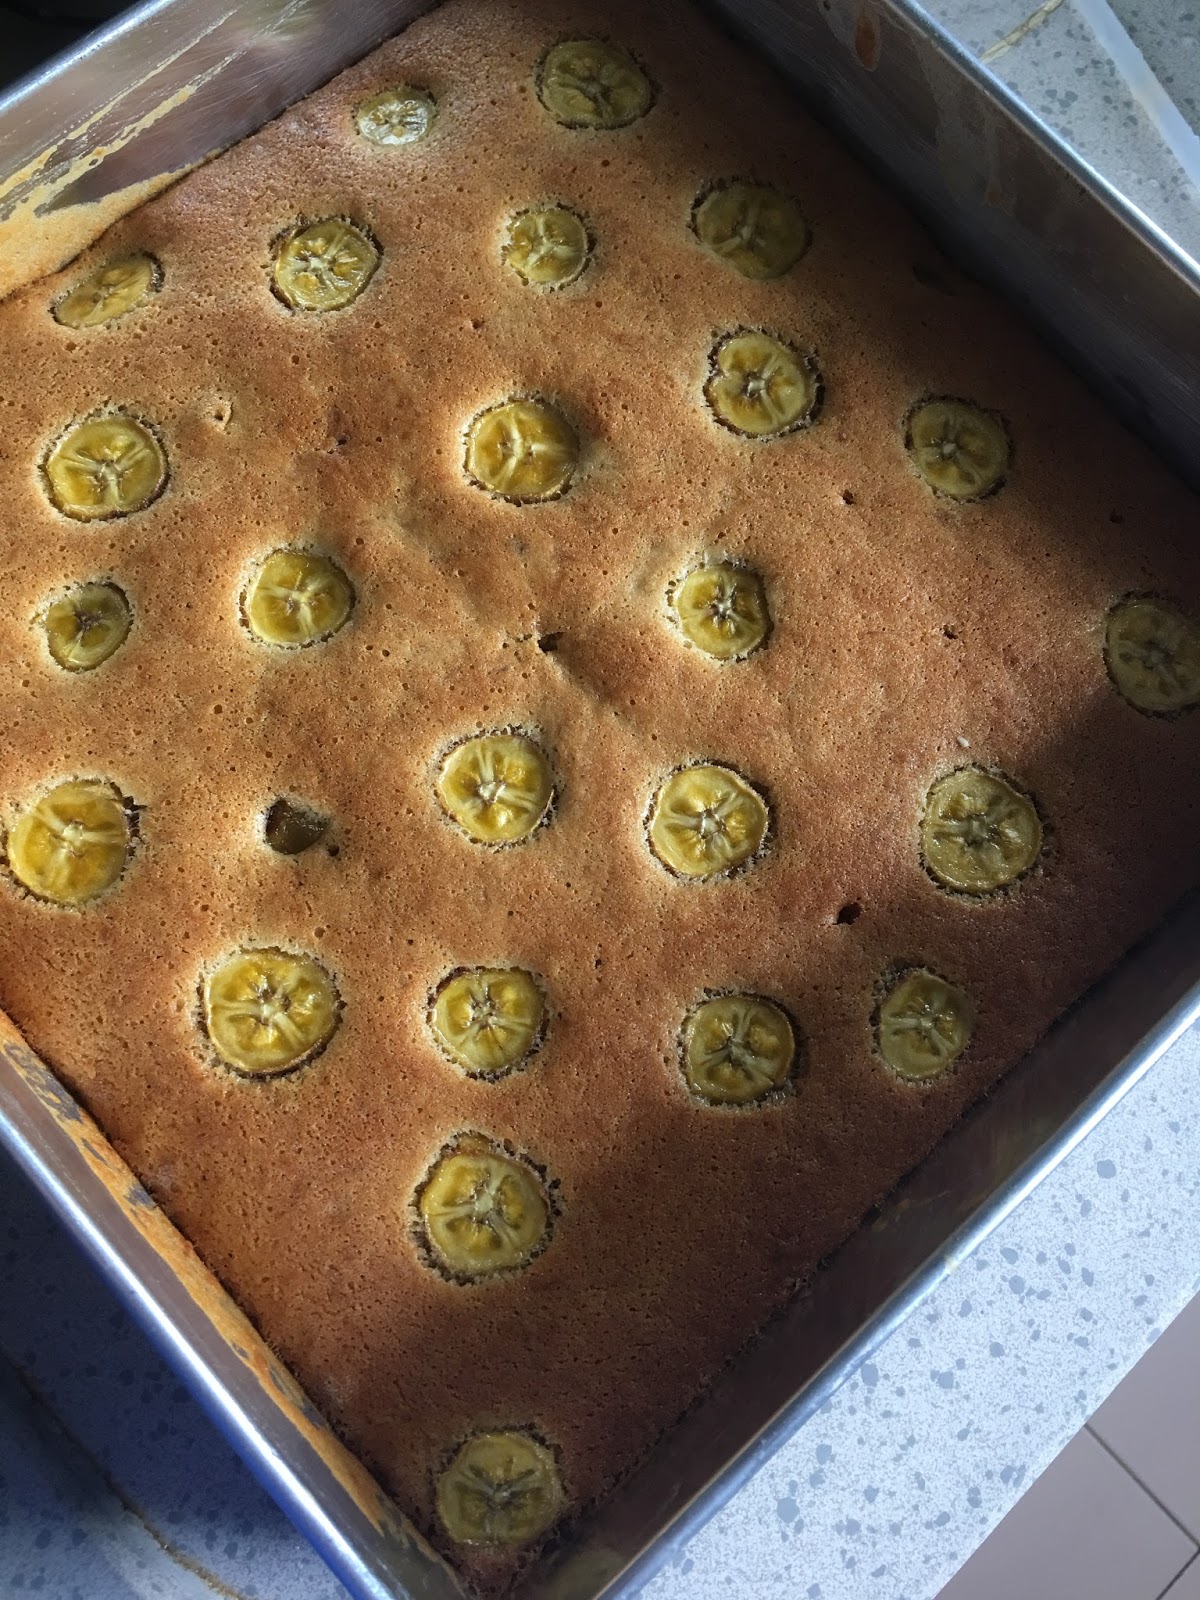
I always have wanted to try to bake a banana cake so as to satisfy my sister liking for a good banana cake. I adapted this cake from the website(https://travelling-foodies.com/2014/10/25/simple-banana-cake-whole-egg-direct-method/) with some modifications to suit my Aerogaz oven and I used melted butter instead of vegetable oil. The cake turned out very well and it definitely a recipe to keep.
Tin used: 10 inch square tin
Ingredients:
5 Eggs (large size, 70g with shell)
221g castor sugar
375g mashed banana(Weight of mashed overripe bananas and not the weight of the overripe bananas before being mashed)
300g cake flour
1 tsp baking powder
1/2 tsp baking soda
150g melted butter
1 banana, peeled and sliced thinly
How-to-do:
1) Sift the cake flour, baking powder and baking soda together and set aside.
2) Melt the butter over a low fire till all butter have melted. Weight of melted butter to be kept at 150g.
3.Line the square tin with baking paper for easy removal of cake later on.
4. Whisk the eggs,mashed bananas and sugar at the low speed of the hand mixer till ribbon stage(where the mixture could flow continuously without dripping). It takes around 10-12 minutes for the hand mixer that I used.
5. Divide the sifted flour mixture in three portions. Using hands, fold in each portion into the mixture of eggs,mashed bananas and sugar. Ensure all flour have been well folded into the mixture.
6.Add in the melted butter and mix well till batter is shiny.
7.Pour the batter into the square baking tin from a height of 20cm and tap the baking tin hard to eliminate air bubbles.
8. Lay out the thin banana slices on the surface of the batter.
9.Bake the batter in a preheated oven at 160 degrees Celsius for 60 mins.Bake till the surface is nicely browned and the inserted toothpick comes out clean. (I used the fan mode and lowest rack for the first 45 minutes. After which i changed to the top and bottom mode for the last 15 mins of baking so as to allow the top layer to be browned faster while not overbaking the cake).
10. Remove the cake from baking tin and leave to cool on a rack to room temperature. Ready to serve.

Let me know if you tried this recipe as well! Happy baking!
After many months of hesitation and delay, I finally get down my hands onto making mooncake since the season is coming.
I have adapted the recipe from the link (http://www.noobcook.com/traditional-baked-mooncakes/ ) and have done some changes/modifications to the recipe to cater to my volume of mooncakes that I wanted.
Below is my revised recipe:
Baked 23-24 of 50g mooncakes
Mooncake Filling:
840 grams of ready made white lotus paste
50 grams of melon seeds
20ml of peanut oil
Mooncake Dough:
140 grams of golden syrup
1 tsp alkaline water
50ml of peanut oil
1 tsp vanilla extract
200 grams of sifted plain flour
Egg wash:
1 egg yolk
1 tbsp water
Tools/Extra Ingredients:
50g mini mooncake mould
Plain flour for dusting rolling pin, hands, dough and the dusting work surface.
Mooncake crust
1.Combine the golden syrup,alkaline water ,peanut oil and vanilla extract in a large bowl and mix well.
2.Add the sifted flour into the mixture to form a soft dough. Avoid over kneading of the dough.
3.Wrap the dough with cling wrap and put it aside for 2.5 hours.
4.After waiting for 2.5hours, dust the dough with some flour and do some kneading to make it smooth . Divide the dough into portions , each weighing 15 g and rolled into a ball. Put aside.
Filling Paste
5. Preheat oven to 160 degrees celsius. Toast the melon seeds in the oven for around 8 minutes. Occasionally, shake the tray to ensure even heating. Allow to cool.
6. Mix the melon seeds into the lotus paste using your hands. Mix well.
7. Add the peanut oil into the mixture.Divide the paste into portions of 35grams each and rolled into a ball . The number of filling paste balls to follow the number of mooncake dough balls made earlier on.
Making the mooncakes:
1. Dust the dough, mooncake mould and hand with some flour. Flatten the dough(you can use a rolling pin if you like but I used my palm to flatten it) and try to ensure the skin is of equal thickness as much as possible . Wrap the mooncake dough around the ball of filling paste.
2. Lightly dust the wrapped mooncake dough with some flour and place it in the mooncake mould and press firmly. Invert the mould and push out to obtain the 'to be baked' mooncake . Put the 'to be baked' mooncake onto the tray (the tray to be lined with baking paper and with some oil spread across the baking paper). Repeat till all the dough are used up.
3. Baked the moon cakes into the preheated oven of 180 degrees celsius for 10 mins. Remove from oven and put aside to cool for 20 mins.
4.After 20 mins, brush the mooncakes with egg wash. Put the mooncakes into the oven again and bake for another 10 mins/ until the mooncakes have turned golden brown.
5. Let the mooncakes cool and store the mooncakes in an airtight container for 2-3 days . Serve after the mooncakes have been left aside for 2-3 days for the oil to surface and soften the mooncake crust.